Getting Started in Famili Vistas
Welcome to Famili Vistas!
Steps to build your Family tree in Famili Vistas
Registration
-
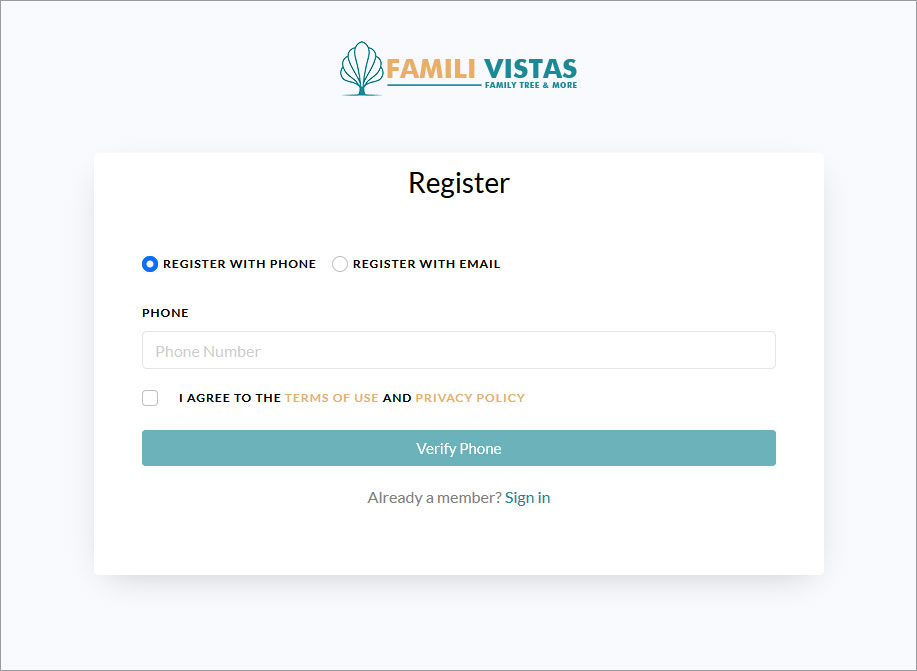
Fill up the registration form by clicking on the registration button on the top right side of the Home page.
- The window to “Register opens. Enter either your Phone # or Email ID and complete the verification by entering your OTP received on the Phone # or Email ID that you have entered.
- Agree on the Terms and conditions and Privacy policy by reading them and checking on the check box.
- On verification completion, the registration page expands to allow entering your name, date of birth, gender, and other optional fields to complete the registration. You receive a registration completion confirmation mail in your registered mail ID.
Login
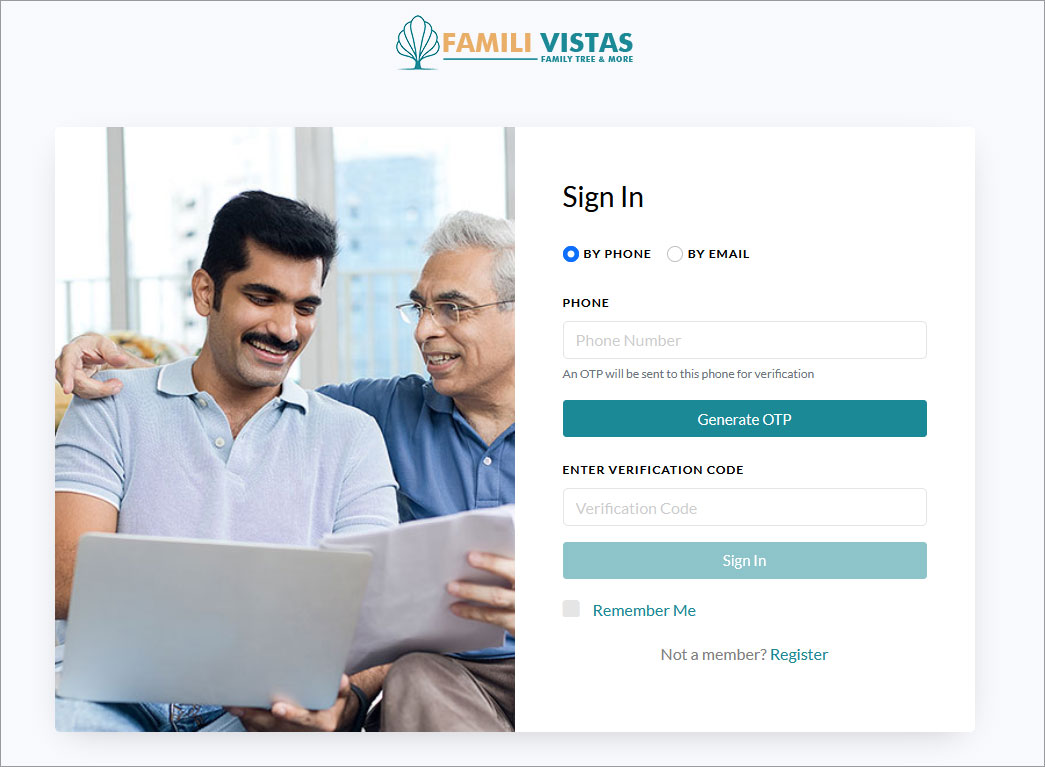
- On completion of registration, you are directed to the Login page. You can also login later by clicking the login button on the top right corner.
- Click on the Login button and enter your login ID (which is your phone # or Email ID entered during registration), it opens-up the plans and pricing page and allows you to select the type of subscription you wish to choose and make the payment through our reliable payment gateway. On completion of payment, you receive a registration completion mail in your registered mail ID.
Start creating your Family Tree
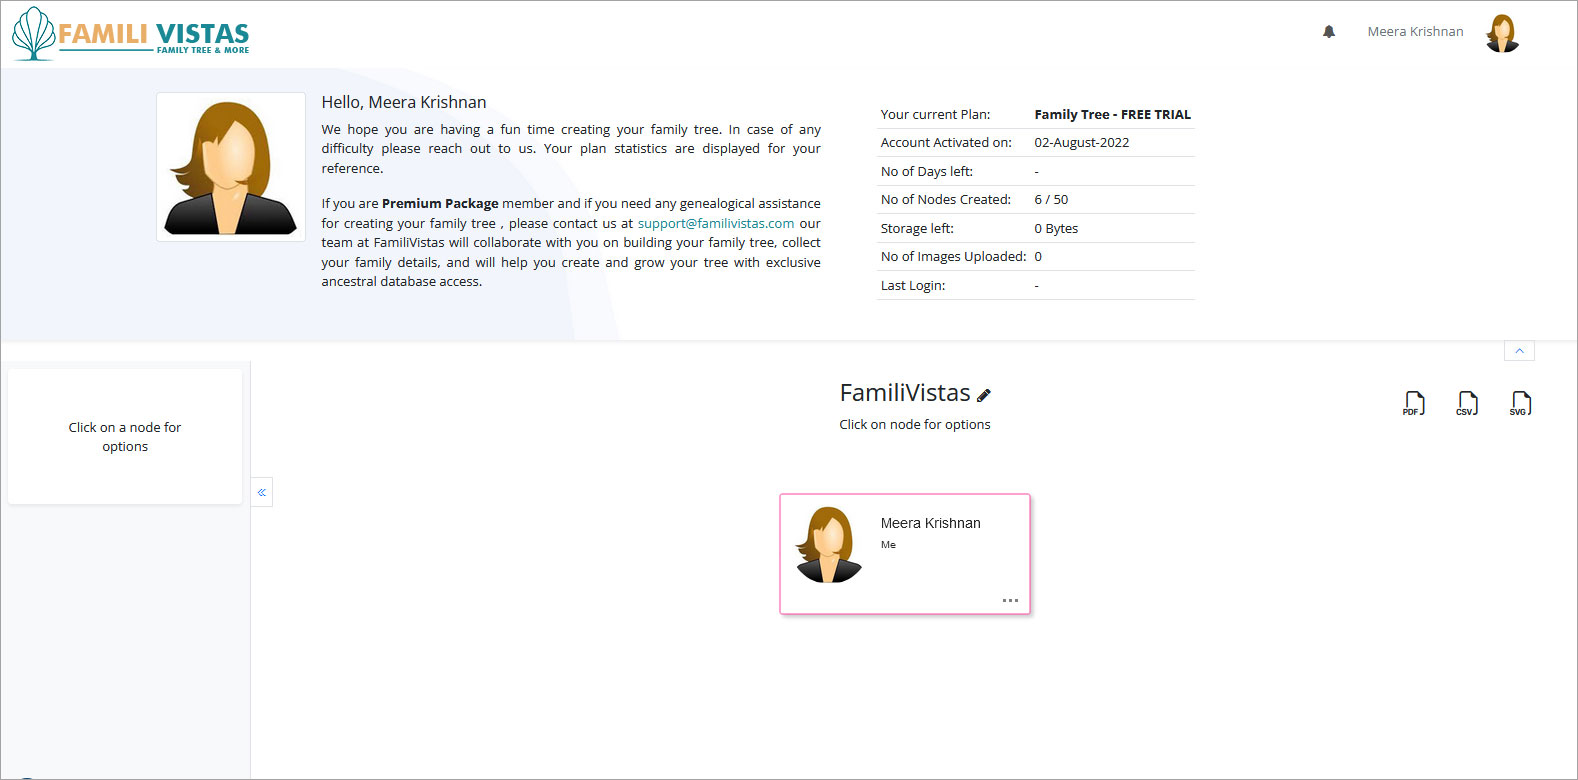
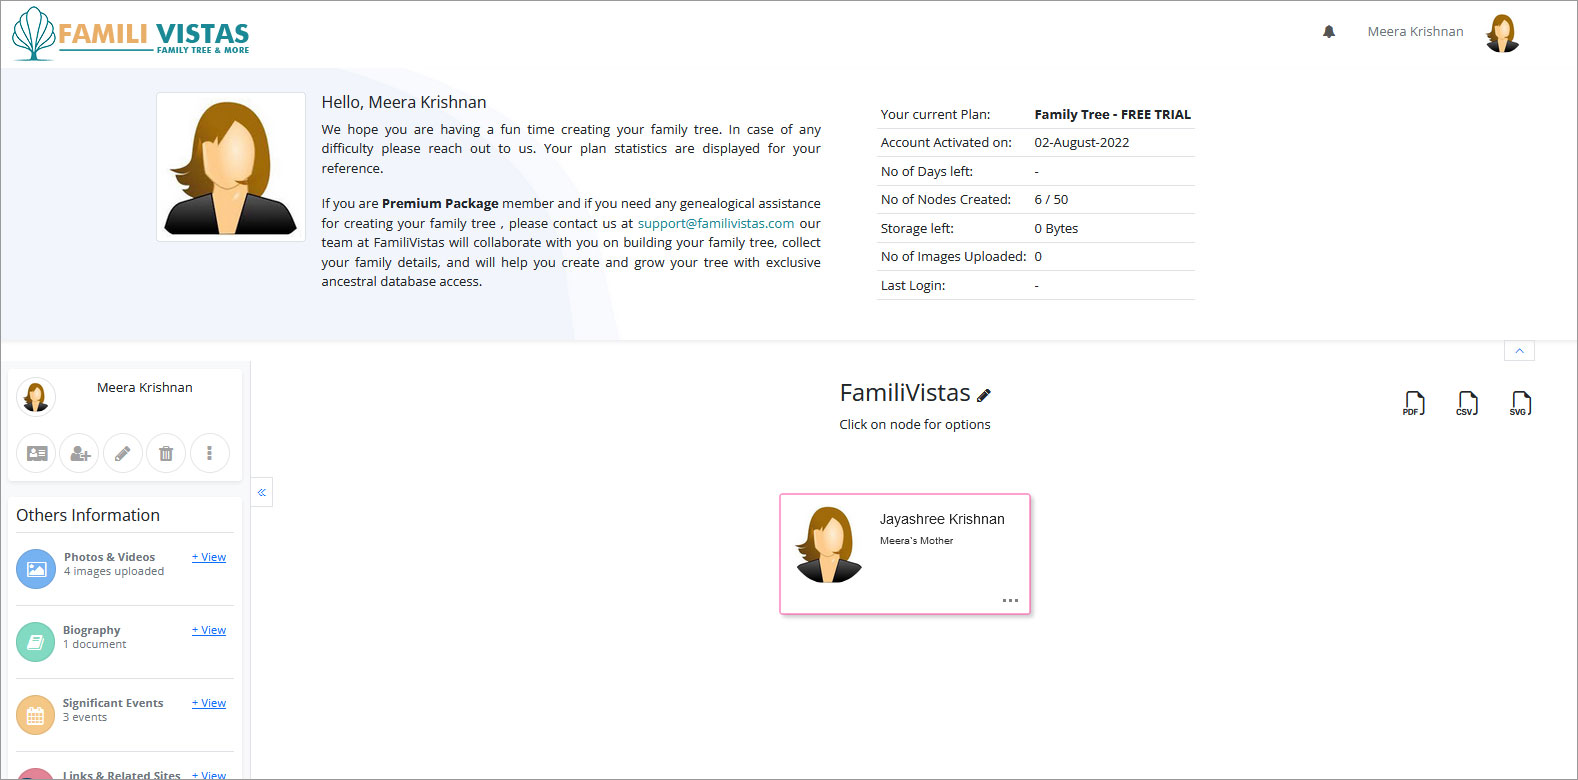
- Now you can login using your User ID and verify using OTP whenever you want, by clicking on Login button on the right side of the home page. This takes you to your Famili Vistas personalized Family Tree home page. You can personalize it further by adding a photograph of your family house or any other picture of your liking. It also shows up your first family tree card with you as the creator. This starts your Family tree.
- You will see your profile photo on the top left side of the screen with icons to add profile photo, add a family member, edit the member, delete the member, invite any family member to view and add their members, Edit profile photo , etc.
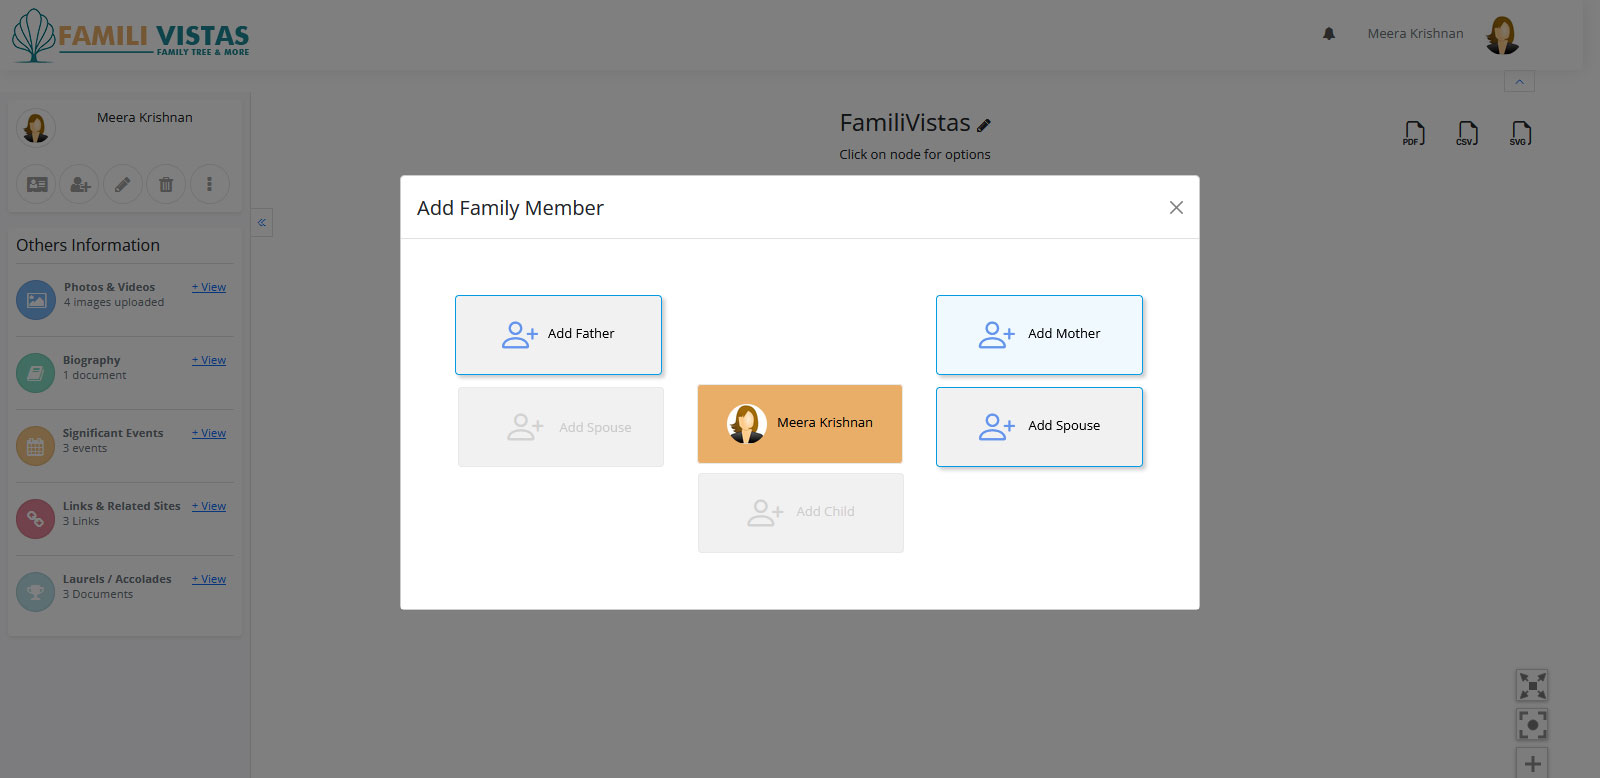
Adding Parents to your Tree
- To Add Father or Add Mother, enter their information either by clicking on Add members icon on the top left on the left side panel or right click your photograph, add , and click Save.
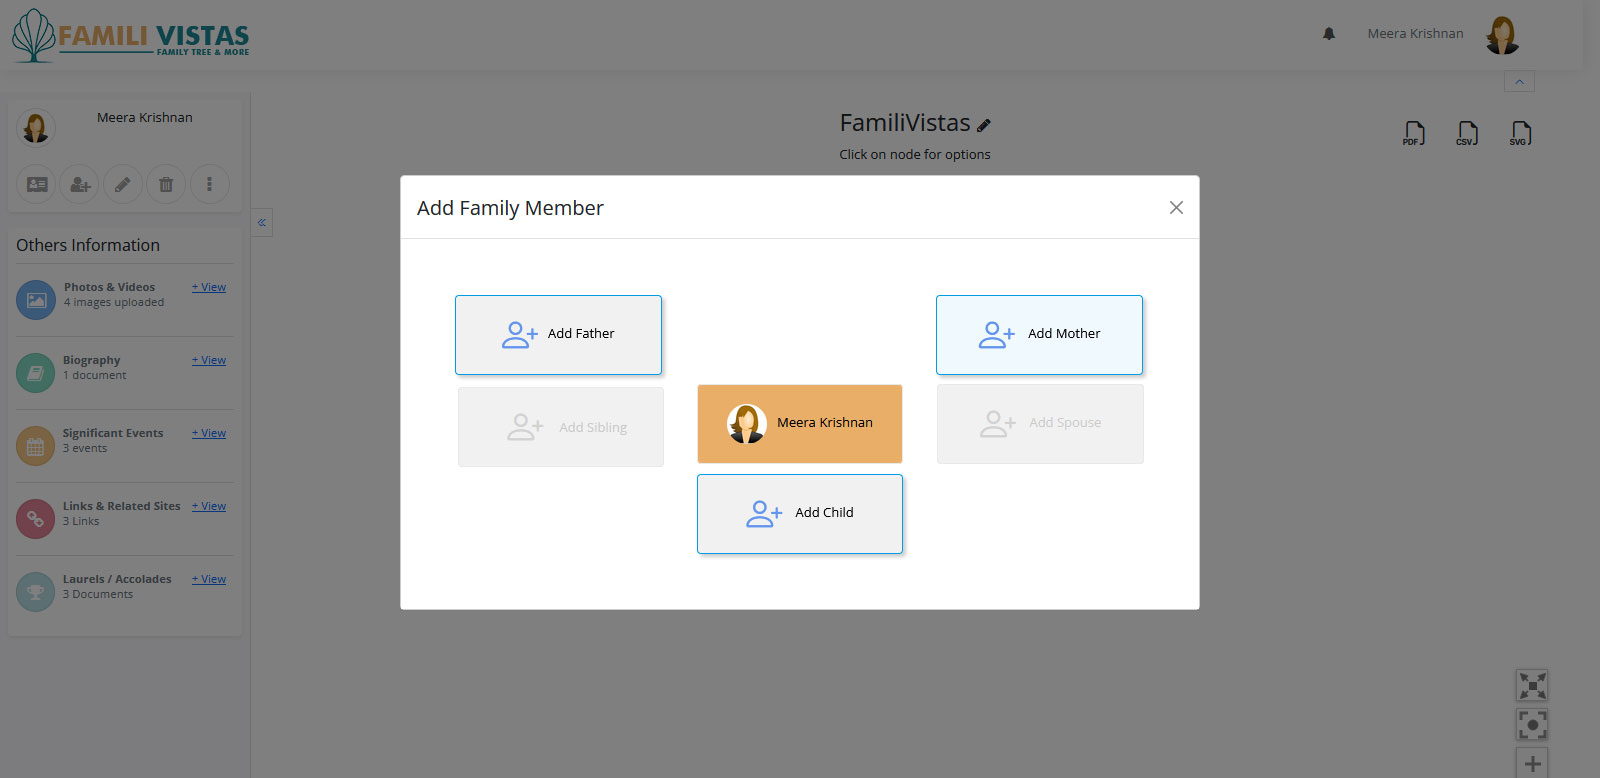
Adding Child or Sibling or Grandchildren
- To add children, click on yourself and select add Child. Enter the mandatory fields to start with which are marked with an asterisk and save. You may complete the rest of the fields later.
- To add grandchildren, click on your child, add a spouse and then add a child to them (same as step above).
- Once you save, you may add more people or enter the name of your tree. Save the tree. Once your tree is created, you can access it anytime thereafter on login.
- Now you can preview your Tree, download your tree; print your tree in pdf, csv & svg format and share with your friends and relatives.
Entering information in a tree
- Names: Enter full names wherever possible. Use maiden names for women (leaving off their married names; these are implied by any spouses they have in the tree).
- Dates: List dates in dd mm yyyy format (for example: 01 Jan 2022). If you’re unsure of the day or year, fill up whatever, you are sure. For Example -you may just enter the Year or month and Year only.
Correcting mistakes
- For editing relationships in your tree incorrectly entered; click edit, make the changes and save.
- To change name, gender, living status, or birth or death information you incorrectly entered; click edit the icon on the left of the screen below your profile image and click save.
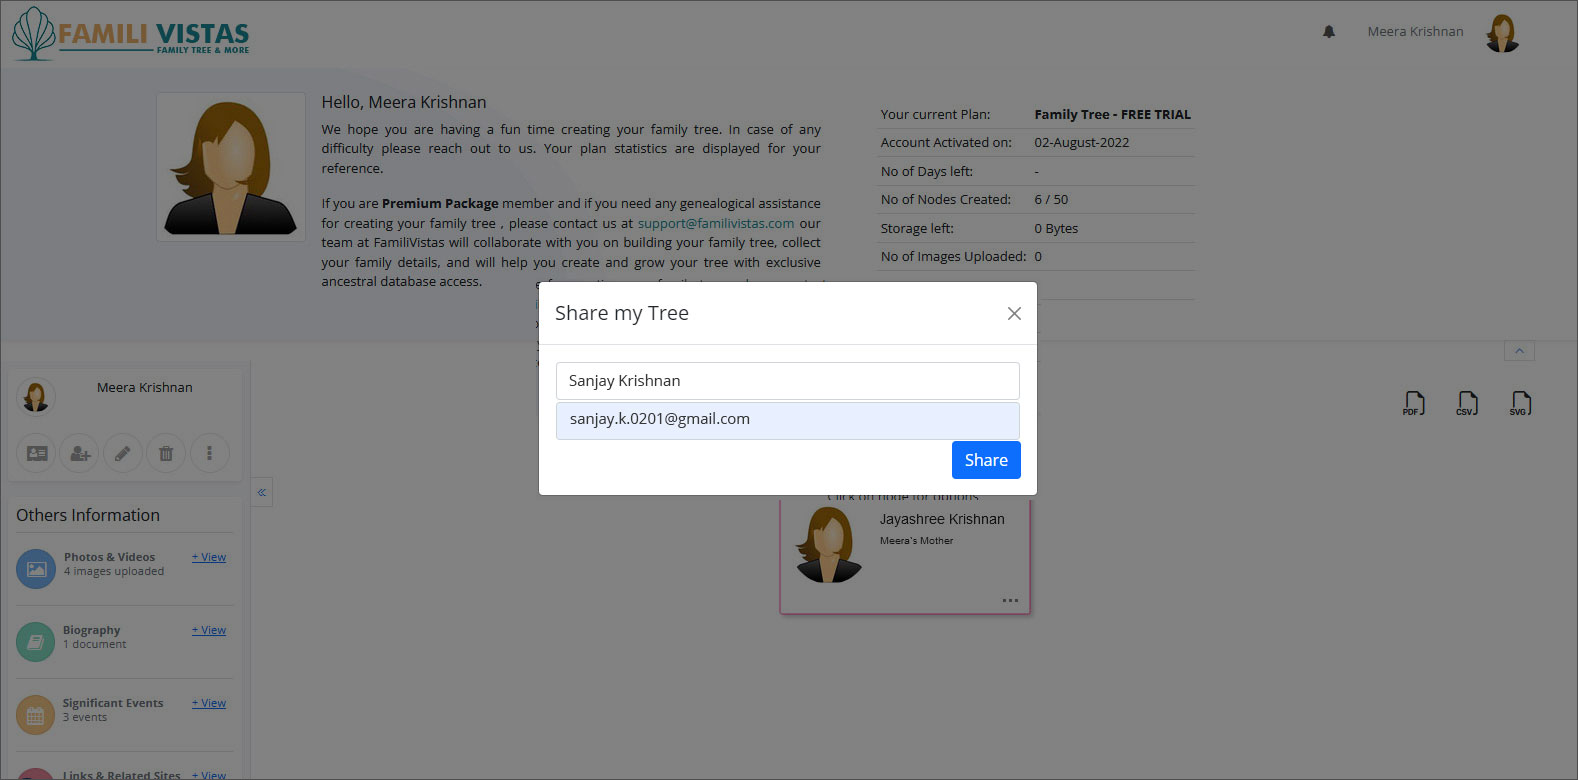
Sharing your tree
- Click your node and then click on the arrow button towards the left side panel, which opens the panel. Select the More button at the extreme right side of the panel; allowing you to click “Share” and select either a member or a non member to share your Family Tree.
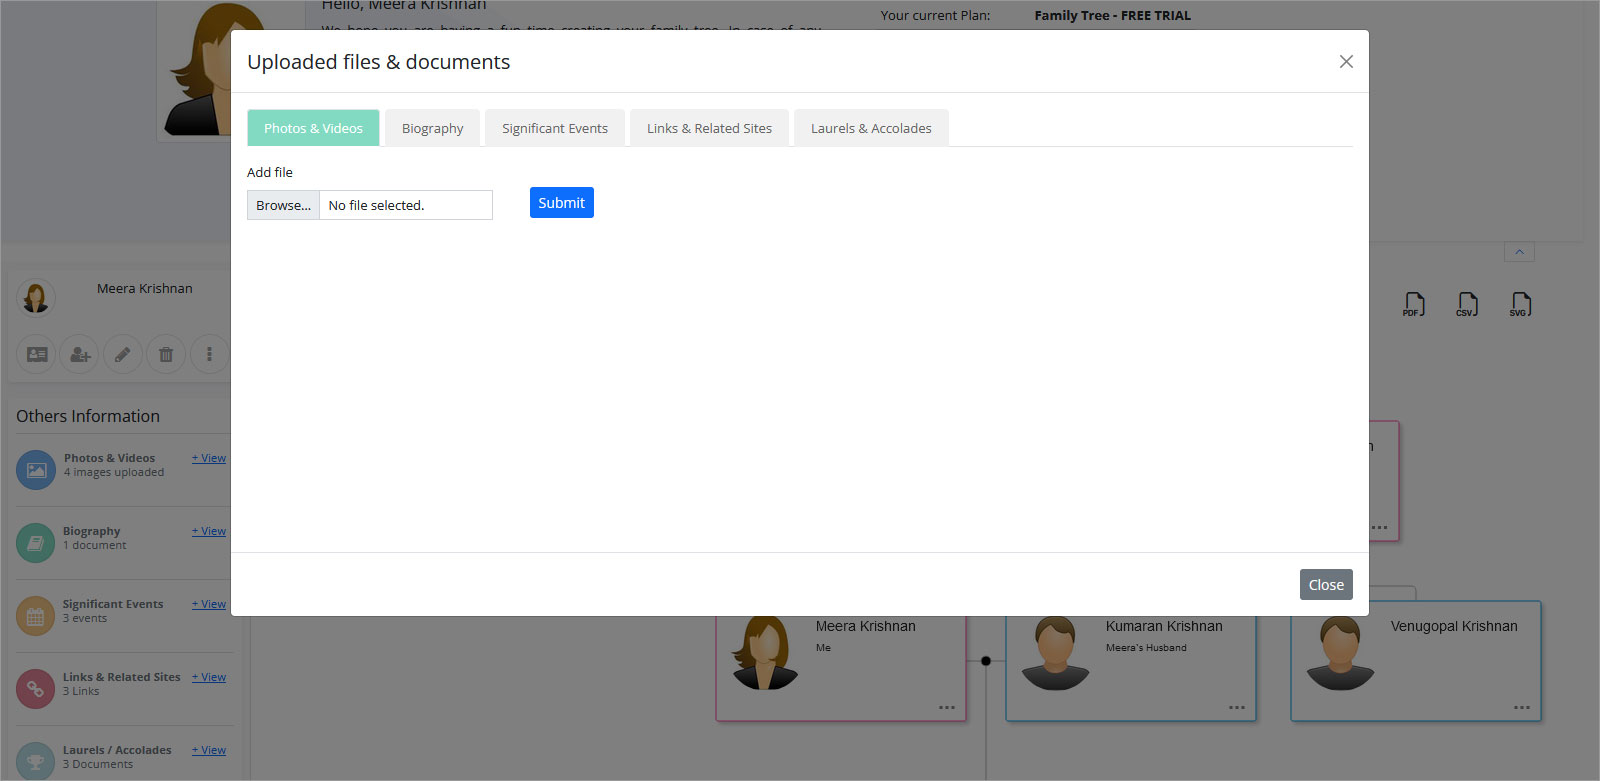
Add Photos, Videos, Bibliography
- On clicking a node you can see on the Left side a vertical panel to add Photos and videos.
- You can add photos upto a size of 2 mb and videos upto size of 500 mb, as per plan
- You can add Biography of your Family in a space to enter.
- You can add significant events which provide a space to enter the event with date and Photographs of size upto 500 mb as per plan.
- Links to related sites of your choice to provide more details of your family
- Laurels and accolades comprising photographs ( max 4-5 of size )